
Basement Finishing Process Timeline: What to Expect Step by Step in Aurora
If you are planning to finish a basement in Aurora, understanding the basement finishing timeline steps matters as much as the budget. Knowing which step comes first, where the city inspections land, and which trades you can handle yourself keeps the project moving and keeps you out of trouble with the permit office. This guide walks the process in order, step by step, so you know what to expect from the first permit application to the final inspection.
Most basement finishes in Aurora run six to twelve weeks of actual work once permits are approved. Delays almost always come from two places: waiting on permits and failing an inspection. Both are preventable if you follow the sequence below.
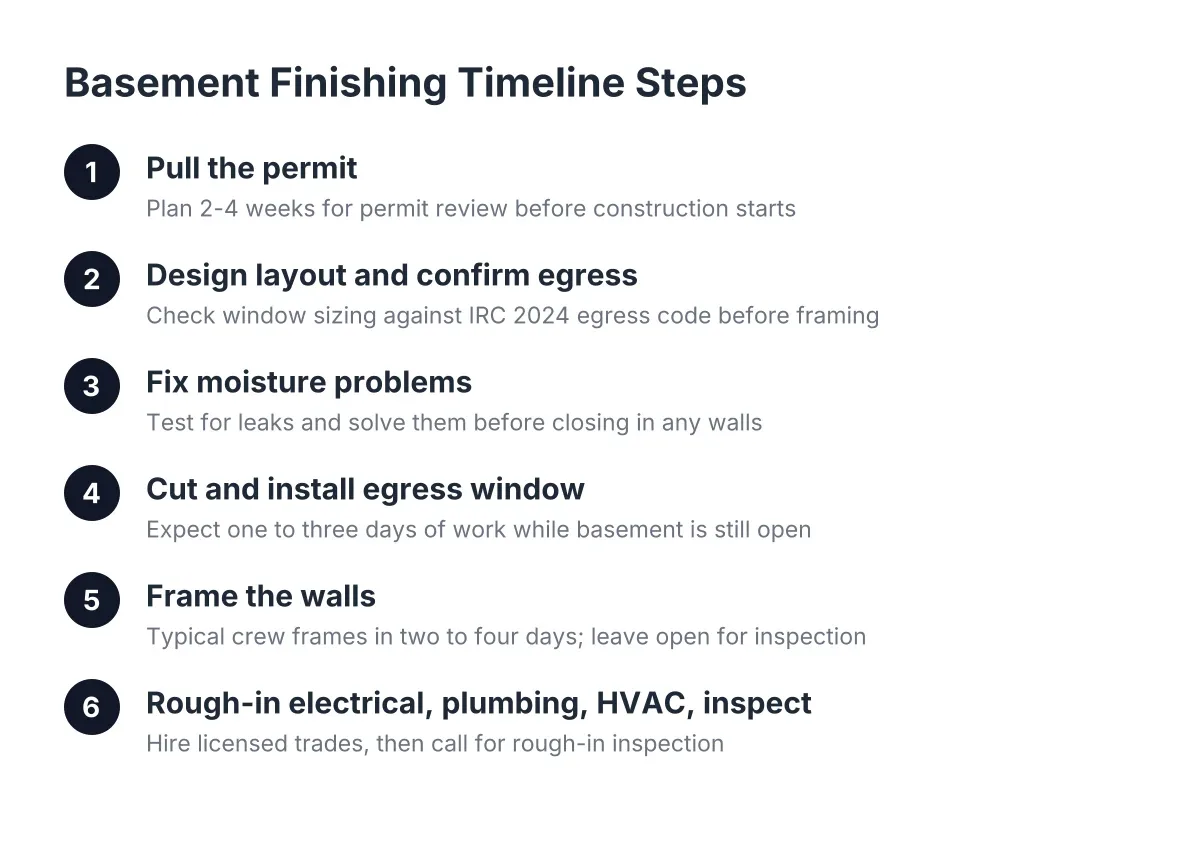
Step 1: Pull Your Basement Remodeling Permit Before Anything Else
Start with the permit, not the lumber. In Aurora, finishing a basement requires a building permit because you are adding living space, framing walls, and running new electrical. Skipping it is the single most expensive mistake a DIYer can make. If the city red-tags unpermitted work, inspectors can require you to open finished walls so they can see the framing and wiring behind the drywall.
Here is the general split of what needs a permit on a basement finish:
- Permit required: framing new walls, new electrical circuits and outlets, new plumbing lines, ductwork changes, adding a bedroom, and cutting a new egress window opening
- No permit typically needed: paint, carpet or flooring over an existing finished surface, trim, and furniture-grade shelving that does not attach to framing
Plan on two to four weeks for permit review before you can swing a hammer, depending on the city's backlog. Your plans need to show the layout, electrical, and egress. If drawing plans is not your strength, this is where basement remodeling permit assistance from a local contractor earns its keep, even if you do most of the physical work yourself.
Basement Finishing Timeline Steps in the Permit Process
Permit review happens before any construction, so it sits at the front of the basement finishing timeline steps. Use the waiting period to finalize your design, order the egress window, and line up your electrician. Homeowners who treat the review window as planning time rather than dead time shave weeks off the back end.
Step 2: Design the Layout and Settle Egress Before You Frame
Design a basement around code first, comfort second. The biggest code item is egress. Under the IRC 2024 code, every basement sleeping room needs an emergency escape and rescue opening with at least 5.7 square feet of net clear opening, according to EgressUSA. In addition, the opening must have a maximum sill height of 44 inches above the finished floor and a minimum net clear opening width of 20 inches, according to The Great Egress Co.
Measure your existing windows against those numbers before you lock in a floor plan. If your planned bedroom window falls short, you need a basement escape window cut and installed, which involves concrete cutting, a window well, and its own inspection. Egress window sizing trips up more DIY basement bedrooms than any other code item, so get it confirmed on paper first.
Also map your mechanicals now. Note where the furnace, water heater, and main drain lines sit, because code requires access to them. In a low ceiling basement, plan around ducts instead of fighting them; soffits are cheaper than relocating trunk lines.
Step 3: Fix Moisture Problems Before You Close Anything In
Test for water before you spend a dollar on framing. More than 60% of U.S. homes with basements have some degree of water penetration or moisture problems, according to the American Society of Home Inspectors. Tape a square of plastic sheeting to the slab for a few days and check for condensation underneath. Walk the walls after a hard rain.
If you find active leaks, stop and solve them first. Grading, downspout extensions, or crack sealing done now costs far less than tearing out moldy drywall in three years. Understanding the basement finishing timeline steps helps you place moisture testing and repairs in the correct sequence before moving forward with construction.
Step 4: Cut and Install the Egress Window
Schedule the egress window installation early in construction, while the basement is still open. Concrete cutting is loud, dusty work, and doing it before framing keeps the mess away from new materials. If the basement were already finished, a structural frame system installed from the exterior could limit demolition to the interior stud line, but on an unfinished basement the straightforward interior cut is simpler.
This is a step most permit-wary DIYers should hire out. It involves cutting a structural opening in a foundation wall, setting a header, waterproofing the opening, and installing a code-compliant well with a ladder if the well is deep. An improper cut risks the foundation itself. Expect one to three days of work for a typical install.
Step 5: Frame the Walls
Framing is the most DIY-friendly structural step, and it moves fast. A typical crew frames an average basement in two to four days; a capable homeowner working weekends might take two to three weekends. Snap your lines, build to your approved plans, and keep required clearances around the furnace and water heater.
However, do not drywall yet. Framing has to stay open for the rough-in inspections that come next. Covering work before inspection is the classic red-tag scenario, and it is the exact horror story most homeowners have heard from a neighbor.
Step 6: Rough In Electrical, Plumbing, and HVAC, Then Call for Inspection
Hire licensed trades for this step even if you do everything else yourself. Electrical and HVAC work requires licensing and skill that framing and drywall do not, and inspectors look at this work closely. A hybrid approach is common and sensible: you frame, hang drywall, and paint, while a licensed electrician wires the space and an HVAC contractor extends supply and return air.
Basement finishes typically involve two separate early inspections: an electrical rough-in inspection first, then an insulation inspection after the insulation goes in. Budget a few days of lag for each, since you wait on the inspector's schedule. Passing rough-in on the first try is the biggest single time-saver in the whole basement finishing timeline steps.
For example, suppose a homeowner in southeast Aurora frames a bedroom, family room, and bath over three weekends, then hires an electrician for a three-day rough-in. In that scenario, the electrical inspection lands in week five, insulation and its inspection in week six, and drywall starts in week seven. That pacing is typical, not slow.
Step 7: Insulate, Pass Inspection, and Hang Drywall
Install insulation to your plan's specified R-value, get the insulation inspection signed off, and then close the walls. Drywall is heavy, repetitive, and well within DIY reach. Hanging an average basement takes a few days; taping, mudding, and sanding take longer than most homeowners expect, often a full week with drying time between coats.
Basements are a forgiving place to build your skills. Minor cosmetic flaws in a basement wall draw far less attention than the same flaws on a main-floor ceiling.
Step 8: Finish Flooring, Trim, and Paint
Finish work is where DIY labor saves real money, and where time estimates slip. Homeowners routinely underestimate trim. A finished basement has more baseboard, door casing, and window returns than almost any room upstairs, and cutting it all cleanly takes patience. Plan one to two weeks for flooring, trim, doors, and paint combined.
One design note worth stealing: carrying a finish detail from the basement up the staircase, such as matching paneling or paint, makes the stairwell feel like part of the new space instead of a leftover. Also resist the common layout mistake of leaving the area at the bottom of the stairs as unfinished storage; that is some of the most usable square footage in the basement.
Step 9: Pass Final Inspection and Close Out the Permit
Call for the final inspection once everything is complete, including smoke and carbon monoxide detectors, outlet covers, and the egress window well. The inspector verifies the finished space matches the approved plans and that the egress opening meets size and sill-height requirements. Passing final closes the permit, which matters at resale; buyers and their inspectors check for open permits.
A closed permit also protects the value of the work. A national basement remodel returns 71% of its cost at resale on average, according to the JLC (Journal of Light Construction) Cost vs. Value Report, and an unpermitted finish undercuts that return because appraisers and buyers discount space they cannot verify as legal.
How the Timeline Connects to Cost
Time and money track together on a basement finish. Every week of schedule slip, failed inspection, or mid-project redesign shows up in your basement finishing cost, whether as rework, extra trade visits, or material waste. The projects that come in on budget are the ones that follow the sequence above: permit, egress, moisture, rough-in, inspections, then finishes, in that order.
Your DIY split also shapes both numbers. Handling framing, drywall, trim, and paint yourself stretches the calendar but cuts labor cost. Hiring out electrical, HVAC, and egress window installation compresses the schedule and protects you at inspection. One honest caveat: if your basement has structural cracks, a sewer line running through the planned space, or headroom below code minimums, get a professional assessment before you commit to a layout, because those issues can reorder the whole plan. If material prices are spiking, waiting a season for them to settle can also be the smarter financial move.
For a real number instead of a national average, a local free estimate tied to your actual square footage, egress needs, and layout beats any online calculator. Walk in with this timeline and you will know exactly what each line item on the estimate is paying for.
If you need basement finishing, Aurora Basement Finishing Pros can help.
Prefer to talk it through? Call (720) 973-5727 — a quick call is usually the fastest way to get a straight answer for your situation.