
Do I Need a Permit to Finish My Basement in Aurora, CO?
Do I need a permit to finish my basement in Aurora? If that is the question you typed, the answer is yes. Finishing a basement in Aurora, Colorado requires a building permit in essentially every case, because you are turning unfinished space into habitable space, and the electrical, plumbing, and mechanical work each carry their own permits and inspections. The questions that actually decide your project are which permits it needs, who is allowed to pull them, and which parts of the job you can legally do yourself. This guide answers that from a contractor's side of the table, with a clear checklist of DIY-safe work versus licensed-pro work, and it explains the "Class D" contractor license label you may have run into along the way.
One note before we start. Permit classes, fees, and license categories change, and cities in the Denver metro do not all use the same labels. What follows reflects how the process generally works in 2026. Always confirm the current rules with the Aurora Building Division before you cut a single stud.
Do You Need a Permit to Finish a Basement in Aurora?
Yes. Finishing a basement in Aurora requires a building permit in essentially every case, because you are converting unfinished space into habitable space. Framing walls, adding or extending electrical circuits, adding plumbing, modifying ductwork, installing insulation, and hanging drywall all fall under permitted work. Painting and flooring alone do not, but a full basement finish always does.
The reason is not bureaucratic box-checking. A finished basement adds bedrooms and living space, and the code exists so that a person sleeping down there can get out in a fire. That is why egress windows sit at the center of every basement bedroom conversation, and why inspectors take them seriously.
Consider a hypothetical that will sound familiar. Say a homeowner in the Saddle Rock area buys a house with a clean, unfinished basement and wants to add a bedroom and a bathroom before renting the space to a tenant. The bedroom triggers egress window requirements. The bathroom triggers plumbing permits. Additionally, the new circuits trigger electrical permits. None of that is optional, and skipping it puts the rental income plan at legal risk, since an unpermitted basement bedroom is not a legal bedroom.
Which Parts of the Project Trigger Inspections
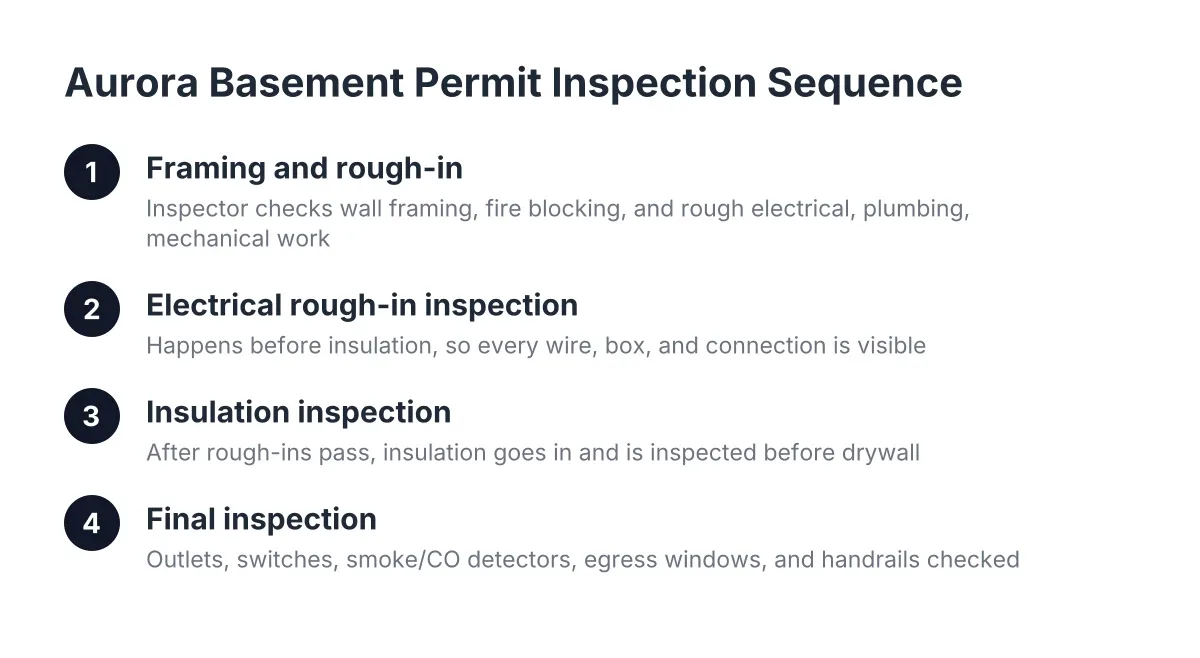
Every permit comes with inspections, and a basement finish gets several. Expect the sequence to look like this:
- Framing and rough-in stage: the inspector checks wall framing, fire blocking, and the rough electrical, plumbing, and mechanical work before anything gets covered.
- Electrical rough-in inspection: this typically happens early, before insulation goes in, so the inspector can see every wire, box, and connection.
- Insulation inspection: after rough-ins pass, insulation goes in and gets inspected before drywall hides it.
- Final inspection: outlets, switches, smoke and carbon monoxide detectors, egress window operation, handrails, and finished details all get checked.
The order matters. The single most common DIY mistake is hanging drywall before the rough-in and insulation inspections pass. If the inspector cannot see the wiring, the fix is tearing drywall back off. Those horror stories you have heard about people ripping out finished walls are usually this exact sequencing error, not some vindictive inspector.
Who Can Pull the Permit: Homeowner Permits and the Class D Label
If you search "class d permit," Google mostly shows driver's license pages from Massachusetts and New York. That is not what you need. In residential construction, a Class D permit is a type of contractor license and permit classification that some Colorado-area building departments use for limited-scope residential work.
A Class D permit, in the building-department sense, refers to a limited license or permit class tied to smaller-scope residential work. Different Colorado jurisdictions letter their contractor license classes differently; in many metro-area systems, Class A covers all building types, Class B covers larger commercial work, Class C covers residential structures, and Class D covers limited residential work such as remodels, finishes, and repairs that do not change the structure of the home.
Here is why that matters to you as a homeowner. When you hire a contractor to finish your basement, the city checks that the contractor holds the right license class for the work before it issues the permit. A basement finish with no structural changes typically falls within the limited residential category. If your project includes cutting a new egress window opening into a foundation wall, the scope changes, and so can the license class the city requires.
The confusion online comes from the fact that "class d permit" also means a standard passenger driver's permit in states like New York, Massachusetts, and Minnesota. Those pages dominate search results. They have nothing to do with basement remodeling permits, and if you have been reading about permit tests and learner restrictions, you can safely close those tabs.
Class D Permit Versus a Homeowner Permit in Aurora
The distinction that saves DIYers real money is this: contractor license classes apply to contractors, not to you. Aurora, like most Colorado cities, allows a homeowner to pull a permit for work on their own primary residence without holding any contractor license class at all.
That homeowner permit path comes with conditions. You must own and occupy the home, you take on legal responsibility for code compliance, and you are the one the inspector talks to when something is wrong. For a house-hacker planning to rent out the finished basement, this matters even more; some jurisdictions restrict homeowner permits on properties that are rentals rather than primary residences, so verify your situation with the Building Division first.
Therefore, the practical takeaway is this. If you hire a pro for the whole basement finish, their license class and permit paperwork are their problem. If you act as your own general contractor, you pull the building permit yourself, and any licensed trades you hire pull their own trade permits under their own licenses.
What You Can DIY and What Requires a Licensed Pro
This is the checklist most permit-wary DIYers are actually looking for. In Aurora, as a homeowner working on your own primary residence, you can legally do more than you might think, but a few trades are worth hiring out regardless of what the law allows.
Work that is generally DIY-friendly under a homeowner permit:
- Framing walls, soffits, and bulkheads
- Hanging, taping, and finishing drywall
- Installing insulation, once the rough-in inspections pass
- Painting, trim, doors, and flooring
- Installing a subfloor system over the concrete slab
Work that should go to a licensed pro, and in some cases must:
- Electrical: new circuits, panel work, and anything beyond swapping a fixture. Aurora requires electrical work to be permitted and inspected, and licensed electricians pass rough-in inspections on the first try far more often than first-time DIYers.
- Plumbing: new drain lines, vent stacks, and supply lines for a basement bathroom or wet bar.
- HVAC: extending ductwork, adding returns, or splitting runs to serve the new rooms. Rerouting ducts is also how contractors free up ceiling height in a low ceiling basement without losing airflow.
- Structural cuts: sawing a new egress window opening into a foundation wall. This is concrete cutting near a load path, and it is not a weekend project.
Basements are a forgiving place to learn carpentry and finish work. Imperfect drywall seams in a basement rec room bother nobody, as long as everything behind the wall is dry, inspected, and to code. That is why the DIY-plus-pro split works so well down there: you save money on the labor-heavy cosmetic work and spend it where licensing and skill actually protect you.
Egress Windows and the Permit Class Question
Egress work deserves its own note because it is where scope, and sometimes permit class, changes. Cutting a new basement escape window into concrete is structural work, and the city treats it that way. If your existing basement window is too small, do not assume a bigger window sash fixes it; the opening itself usually has to grow.
The sizing rules are specific. Under the IRC 2024 code, every basement sleeping room needs an emergency escape and rescue opening with at least 5.7 square feet of net clear opening, according to EgressUSA. In addition, the sill can sit no more than 44 inches above the finished floor, and the net clear opening must be at least 20 inches wide, according to The Great Egress Co. A window can meet one dimension and still fail the others, which is why egress window sizing trips up so many DIYers.
Ceiling height is the other code line that decides whether your basement can be habitable space at all. According to GreenLancer, basements without habitable space can have ceilings as low as 6 feet 8 inches, four inches lower than the requirement for habitable rooms. If your ceiling sits near that line, get a professional opinion before you design a basement layout around rooms the code will not recognize.
What Happens If an Inspector Finds Unpermitted Work
When an inspector finds unpermitted work, the city issues a stop-work order or correction notice, and the project halts until you get a permit and prove compliance. That usually means opening walls so the inspector can see wiring, plumbing, and insulation. In practice, the penalty for building without a permit is less about the fine and more about the demolition.
The fine itself varies by city; many jurisdictions charge a multiple of the normal permit fee when work started without one, sometimes double or more. However, the bigger costs stack up after that. You pay for the permit, you pay for whatever tear-out the inspector requires, you pay to redo anything that fails code, and your project timeline resets.
For a landlord or house-hacker, the exposure runs deeper. An unpermitted basement bedroom cannot be legally advertised as a bedroom. If a tenant is injured in a space that lacks a code-compliant basement escape window, the liability lands on the owner. The rent-income math that justified the project in the first place only works if the unit is legal.
How to Get a Permit After Work Is Done
Getting a permit after work is done is called a retroactive or as-built permit, and Aurora processes them, but the burden of proof sits on you. You apply, describe the work, and an inspector visits. Expect to open sections of drywall at outlets, junction boxes, and plumbing connections so the inspector can verify what is hidden.
Suppose you bought a house in the Aurora Hills area with a basement the previous owner finished without permits, and now you want to sell or rent it. In that scenario, a contractor familiar with basement remodeling permits can walk the space first, flag the likely failure points, and tell you whether legalizing the finish means a few drywall patches or a substantial rebuild. Common failure points include undersized egress openings, missing smoke detectors, no fire blocking, and wiring run in ways the code does not allow.
Unpermitted work also surfaces at resale. Buyers' inspectors flag finished basements with no permit history, appraisers may exclude the square footage, and lenders sometimes require the work to be legalized before closing. A basement finish is one of the stronger remodel investments when done right; the 2025 Cost vs. Value Report from JLC found a national basement remodel returns 71% of its cost at resale on average. Unpermitted work forfeits much of that value.
How the Aurora Basement Permit Process Works, Step by Step
The basement remodel permit process in Aurora follows a predictable path, and knowing it up front is most of the battle. First, you draw a floor plan showing existing and proposed walls, room labels, window sizes, smoke detector locations, and electrical layout. It does not need to be architect-grade for a straightforward finish, but it needs to be accurate and to scale.
Next, you submit the application to the Aurora Building Division Permit Center, along with the plan and the permit fee. The city reviews the plans, may ask for corrections, and then issues the permit. Review timelines vary with the city's workload; a simple basement finish generally moves faster than an addition, but plan for weeks rather than days, and build that into your schedule.
Once the permit is issued, work begins and inspections follow the sequence covered earlier: rough-ins, insulation, then final. Each inspection has to pass before you move to the next stage. When the final inspection passes, the city closes the permit, and you have documentation that the finished basement is legal habitable space. Keep that paperwork; it is what you hand a buyer's agent or a lender later.
Two practical tips from the field. Schedule inspections a few days ahead rather than the morning you need them, and be on site with your permit card and approved plans when the inspector arrives. Inspectors are not adversaries; they answer questions, and a DIYer who asks before covering work almost always fares better than one who guesses.
Planning for Moisture, Materials, and the Things Inspectors Notice
Permits and inspections catch code violations, but they do not catch every judgment call that separates a basement that lasts from one that grows mildew in three years. Moisture is the big one. According to the American Society of Home Inspectors, more than 60% of U.S. homes with basements experience some degree of water penetration or moisture problems. Solve water before you frame a single wall, because no inspection will save drywall installed against a damp foundation.
Material choices help here. Paperless, moisture-resistant drywall resists mildew far better than standard board in below-grade rooms. For wall insulation, taped rigid foam board and closed-cell spray foam are the two main options that block air movement, retard vapor, and deliver the R-value basement walls need. On the floor, a dimpled membrane subfloor panel raised slightly off the slab lets moisture under the floor migrate and dry out instead of accumulating under your finished flooring.
None of these choices appear on the permit application, and that is the point. The permit process confirms your basement is safe and legal. Good design decisions confirm it stays dry and comfortable. A local basement finishing contractor who works in Aurora soil and Aurora code every week can help with both, whether you hire out the whole project or only the egress window, electrical, and permit paperwork while you handle the drywall and paint yourself.
The Bottom Line for Aurora DIYers and House-Hackers
Strip away the jargon and the picture is clear. Yes, you need a permit to finish your basement in Aurora. The "Class D" label you may have seen is a contractor license category, not something a homeowner applies for, and as an owner-occupant you can pull your own homeowner permit instead. Every basement finish in Aurora needs a building permit, every bedroom needs a compliant egress window, and every trade rough-in gets inspected before it gets covered.
Do the framing, drywall, insulation, and finish work yourself if you want the savings. Hire licensed pros for electrical, plumbing, HVAC, and any concrete cutting for a basement escape window. Never cover work before it passes inspection. Follow that split and you get the outcome the permit-wary DIYer actually wants: a legal, inspected, finished basement that passes on the first try, rents or sells without red flags, and never gives the city a reason to knock. If you are unsure where your project sits, a free estimate and a permit conversation with a local contractor costs you nothing but an hour at the kitchen table.
If you need basement finishing, Aurora Basement Finishing Pros can help.
Prefer to talk it through? Call (720) 973-5727 — a quick call is usually the fastest way to get a straight answer for your situation.