
DIY Egress Window Installation vs. Hiring a Pro: What Aurora Homeowners Should Do Themselves
If you are planning a basement bedroom in Aurora, you already know the window question is the big one. DIY egress window installation looks tempting on paper: rent a saw, cut the concrete, set the window, save thousands. The reality is more layered. Some parts of the job are honest DIY territory. Other parts involve cutting a hole in your foundation wall, and getting those wrong costs far more than hiring them out. This guide walks through the project step by step and shows you, at each stage, whether the work makes sense to do yourself or hand to a pro.
One reason the stakes are high: a basement remodel returns 71% of its cost at resale on average, the highest ROI among newly tracked project categories, according to the JLC Cost vs. Value Report. A legal, code-compliant bedroom is where much of that value lives. An unpermitted one can subtract value instead.
Step 1: Confirm You Actually Need an Egress Window
Start by checking whether code requires one at all. In Aurora, as in the rest of Colorado, any basement sleeping room needs an emergency escape and rescue opening. If you are finishing a basement with no bedroom, a rec room and bathroom for example, you may not need a new egress window at all. The moment you frame a wall and call the room a bedroom, the requirement kicks in.
The sizing rules trip up more DIYers than the concrete cutting does. Under the IRC 2024 code, every basement sleeping room must have an emergency escape and rescue opening with at least 5.7 square feet of net clear opening, according to EgressUSA. On top of that, the opening must have a maximum sill height of 44 inches above the finished floor and a minimum net clear opening width of 20 inches, according to The Great Egress Co. All three criteria apply at the same time. A window that hits the square footage but sits 50 inches off the floor fails inspection.
Measure your existing window's net clear opening, which means the actual open space when the window is fully open, not the glass size or rough opening. Many older Aurora basements have hopper windows that come nowhere close. If yours falls short, you need a new or enlarged opening, and that is where the real project begins.
Step 2: Pull the Permit Before You Touch the Foundation
Do not skip this step, even if you plan to do most of the work yourself. Cutting a foundation wall is structural work, and Aurora requires a permit for it. This is exactly the kind of project that gets red-tagged when a neighbor calls it in or an inspector spots a fresh window well from the street. Fixing unpermitted structural work after the fact usually means opening up finished walls, which is the horror story every permit-wary DIYer has heard.
Here is the practical checklist for the permit side of an egress project:
- A permit for cutting the foundation and installing the window
- An engineered or code-compliant plan for the new opening, including any required header or lintel
- Correct egress window sizing shown on the plan
- A window well that meets minimum dimensions, with a ladder if the well is deeper than 44 inches
- Inspections at the required stages, typically before backfill and at final
The good news for a DIYer: in most cases a homeowner can pull their own permit for work on their own home. If the paperwork feels like a maze, permit assistance is one of the narrow services you can hire without committing to a full basement remodeling contract. You do not have to buy a whole remodel to get help with the code parts.
Step 3: Decide Which Parts of DIY Egress Window Installation You Should Actually Do
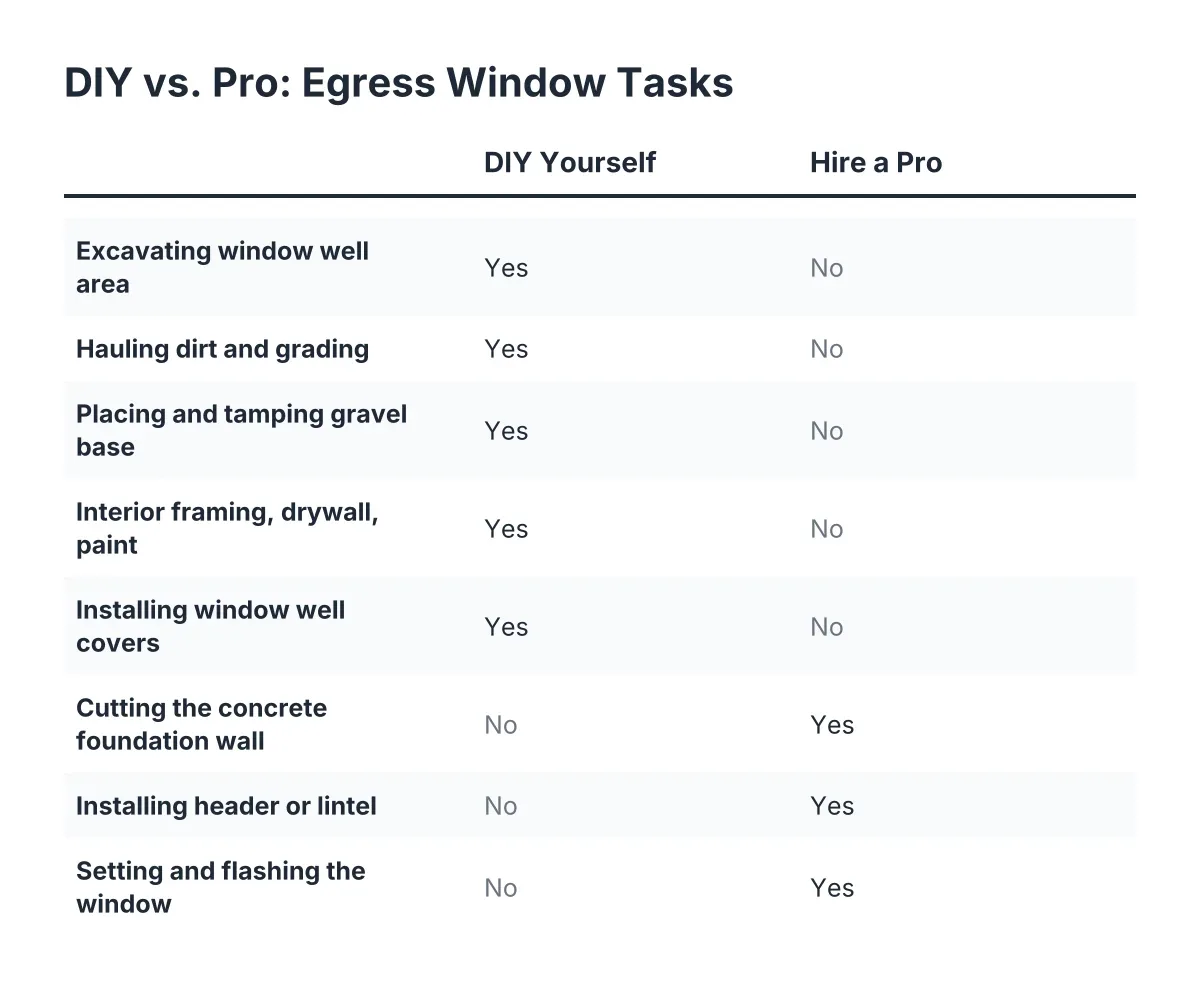
Can you install your own egress window? Legally, yes, in most owner-occupied situations with a permit. Practically, the smart answer is to split the job. The tasks divide cleanly by risk and by equipment, and the money you save doing the low-risk parts yourself is real.
Work that fits a capable DIYer:
- Excavating the window well area by hand or with a rented mini excavator
- Hauling dirt and grading around the well
- Placing and tamping the gravel base at the bottom of the well
- Interior framing, drywall, and paint after the window is in
- Installing basement window well covers once the well is set
Work that belongs with a pro:
- Cutting the concrete foundation wall
- Installing the header or lintel above the new opening
- Setting and flashing the window in the concrete
- Anchoring the window well and tying in drainage
Dig your own hole and you save a meaningful chunk of the labor cost. When you excavate, dig a couple of inches larger than the well on every side so nobody has to come back and remove more dirt with the well half set. Also note that if your basement already has a window in the right spot, the opening often gets deepened downward rather than widened, since existing openings frequently have adequate width. That changes the cut, the sill detail, and the well depth, and it is a judgment call a contractor makes at the wall, not from a YouTube video.
Step 4: Understand Why the Concrete Cut and Seal Are Not DIY-Friendly
The cut itself is the most dangerous hour of the project. A foundation wall is 8 to 10 inches of reinforced concrete, and cutting it takes a wet saw with a diamond blade, dust and water control, and a plan for catching a slab of concrete that can weigh several hundred pounds. Concrete cutting crews do this daily. A first-timer with a rented saw is one slip away from a cracked wall or a crushed foot.
Sealing is the quieter risk, and it matters more in the long run. An egress window sits below grade, pressed against soil that stays damp and swings through hard freeze-thaw cycles every Colorado winter. A conventional installation relies on caulk joints between vinyl, wood, and concrete, three materials that expand and contract at different rates. Those joints are the long-term weak point. When they fail, they often fail silently, with a slow leak feeding mold behind the drywall for months before anyone notices. More than 60% of U.S. homes with basements experience some degree of water penetration or moisture problems, according to the American Society of Home Inspectors, and a poorly sealed below-grade window is a common way to join that group.
Drainage design matters just as much. The gravel base under the well needs to be tamped, graded, and ideally tied to your perimeter drain or a gravel column deep enough to accept runoff. Get this wrong and every summer thunderstorm turns your window well into a fish tank. This is the step where DIY egress window installation most often goes sideways, because the mistake stays invisible until the first big storm.
Step 5: Compare the Real Cost of DIY vs. Hiring It Out
DIY egress window installation costs less up front, but the gap is narrower than most homeowners expect. The window, the well, the gravel, the permit, and the tool rentals are fixed either way. What you save by going DIY is labor, and much of that labor sits in the two phases you should not do yourself anyway: the concrete cut and the set-and-seal.
Suppose a house-hacker in an Aurora rental-heavy zip code wants to add a legal basement bedroom to a rental unit. In that scenario, the hybrid approach usually pencils best: the owner digs the well and handles interior finish work, then hires a crew for the cut, the window installation, and the drainage. The owner saves the excavation and finish labor, the legal bedroom raises the achievable rent, and the permit file protects the rental at appraisal and at lease-up. That is the ROI math that makes egress work pay for a small landlord.
Every yard is different, though. Utility lines near the foundation, high water tables, and tight side setbacks can all change the plan, and exact numbers depend on your wall, your soil, and your window choice. A free estimate from a local contractor tells you what the pro portion costs on your specific house, and you can then decide which pieces to keep for yourself.
Step 6: Finish the Well, the Cover, and the Inspection
Once the window is set and sealed, the remaining work is comfortably DIY. Backfill around the well in lifts, compacting as you go, and grade the surrounding soil away from the foundation. Install the well ladder if the depth requires one. Then add a cover; a window well with cover keeps out snow, leaves, and kids' basketballs, but code requires that it open from inside without tools or keys. Bolt-down covers fail inspection for exactly that reason.
Schedule your final inspection before you close up any interior framing around the window. Inspectors want to verify the opening dimensions, the sill height, the well size, and the ladder. Passing on the first try comes down to the sizing math from Step 1 and a well that meets the minimum projection and area. If the professional egress window installation was done to the permitted plan, this inspection is usually the easy part.
Where the DIY and Pro Paths Land
Here is the honest bottom line for the permit-wary DIYer. Basements forgive imperfect carpentry; nobody sees a slightly wavy drywall seam behind a dresser, and a watertight but ugly interior trim job costs you nothing. Foundations and below-grade seals do not forgive anything. Do the digging, the framing, the drywall, and the paint yourself. Hire out the cut, the set, the seal, and the drainage, and pull the permit no matter who does the work.
Handled that way, you keep the savings that matter, you skip the risks that can wreck the project, and you end up with a legal bedroom that adds real value whether you rent it out or sell in a few years.
If you need basement finishing, Aurora Basement Finishing Pros can help.
Prefer to talk it through? Call (720) 973-5727 — a quick call is usually the fastest way to get a straight answer for your situation.