
Plumbing a Basement Bathroom: Drains, Venting, and Ejector Pump Costs
Here is the problem most basement remodeling articles skip: your basement bathroom sits below the sewer line. Everything upstairs drains by gravity. Down there, gravity works against you. That single fact drives most of the cost, the layout, and the headaches of plumbing a basement bathroom. If you understand it before you talk to a contractor, you will read quotes with clear eyes instead of guessing why one bid is twice another.
This guide walks through the process step by step, the way a contractor would explain it at your kitchen table. It focuses on the three things generic content glosses over: where the waste goes, how the drains breathe, and what a sewage ejector pump actually does. We work with homeowners in Aurora, CO, so the permit notes here reflect how projects run locally, but the plumbing logic applies anywhere.
One note before we start. A basement bathroom is a frequent add-on to a full basement finishing project, and it is usually the single biggest line item on the quote. Knowing why helps you budget with confidence.
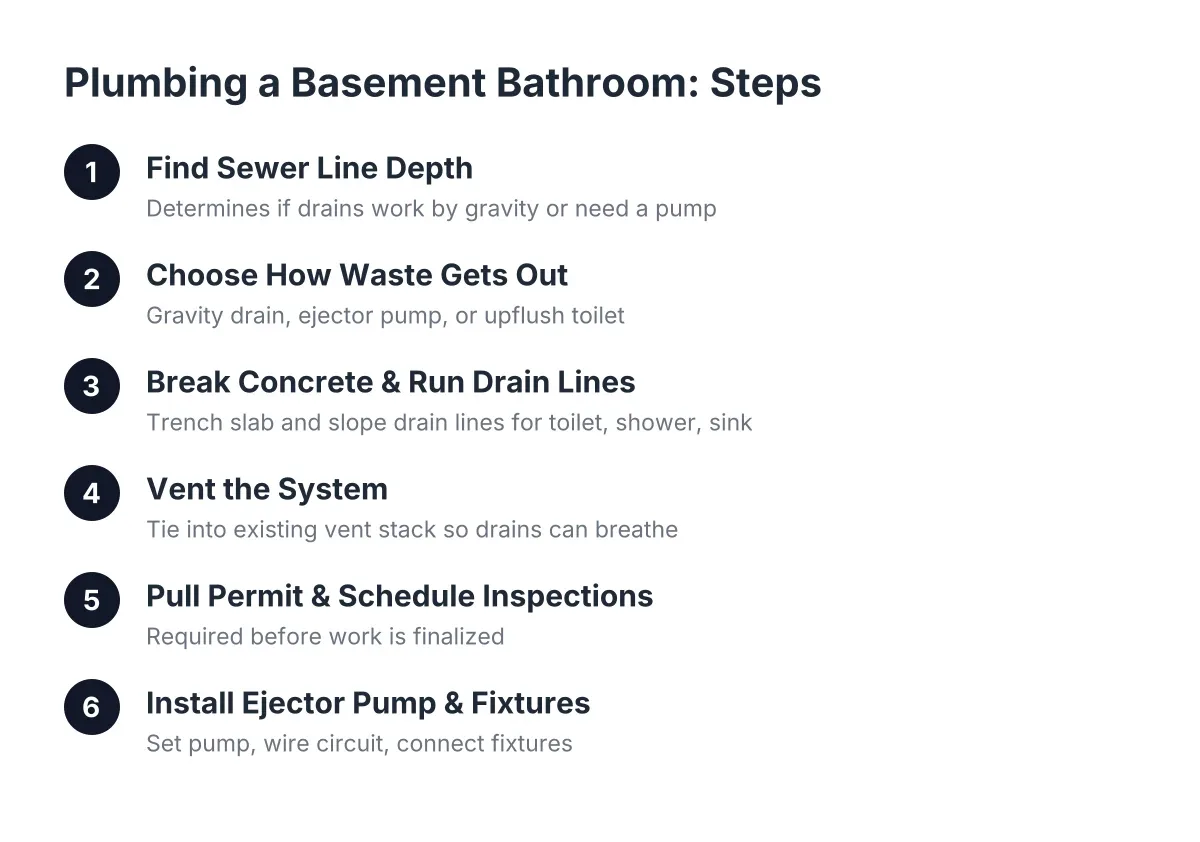
Step 1: Find Your Sewer Line Depth Before Anything Else
Locate where your main sewer line exits the house and how deep it sits. This one measurement decides whether your bathroom drains by gravity or needs a pump, and that decision can swing your basement bathroom remodel cost more than any tile or vanity choice.
In many Aurora homes, the sewer line exits below the basement slab. If it is deep enough, your new toilet and shower can tie in by gravity, the same way the upstairs bathrooms do. That is the cheaper path.
However, if the line exits at or above slab level, waste cannot flow uphill on its own. You will need a sewage ejector pump, which adds equipment, electrical work, and labor. A plumber can scope the line with a camera and confirm depth in an hour or two; that small upfront cost prevents expensive surprises later.
Some builders rough in basement plumbing during original construction. Look for capped pipes sticking up through the slab, often in a back corner. If you have a rough-in, a large share of the below-slab work is already done, and your budget picture just improved.
Step 2: Choose How the Waste Gets Out
Pick one of three basement bathroom plumbing options based on what Step 1 told you. Each has a different cost profile and a different set of trade-offs.
- Gravity drain. The sewer line is deep enough that new drain lines run downhill to it under the slab. Lowest ongoing cost, no moving parts, but it requires breaking concrete.
- Sewage ejector pump. Drain lines run to a sealed basin set into the slab. A pump grinds and pushes waste up to the main line. This is the standard answer when gravity will not work. It needs a dedicated electrical circuit and its own vent.
- Upflush toilet. An upflush toilet basement bathroom uses a macerating unit behind the toilet to pump waste up through small-diameter pipes, often with little or no concrete cutting. It costs less to install but the units are louder, need maintenance, and some buyers see them as a compromise. If you plan to sell in the next few years, that perception matters.
For a homeowner in a higher-value Aurora neighborhood who is finishing the basement partly for resale, the ejector pump or gravity route usually reads as the more permanent, buyer-friendly choice. According to the JLC (Journal of Light Construction) Cost vs. Value Report, a basement remodel returns 71% of its cost at resale on average, the highest ROI among newly tracked project categories in the 2025 report. A bathroom that works like every other bathroom in the house protects that return.
If your home is on a septic tank instead of city sewer, the same logic applies, but the pump must push waste to the septic line, and your system's capacity should be checked before adding fixtures. That is a conversation for a licensed plumber, not a weekend guess.
Step 3: Breaking Concrete and Running Drain Lines
Rough plumbing a basement bathroom on a concrete floor means cutting and removing sections of the slab to trench for drain lines. This is loud, dusty, disruptive work, and it is a big reason the plumbing rough-in is often the most expensive phase of a basement bathroom addition.
The crew saw-cuts the concrete along the planned drain routes, breaks it out, and trenches the soil beneath. Drain lines for the toilet, shower, and sink get set at the correct slope, typically a quarter inch of fall per foot, so waste flows instead of sitting.
Here is a detail that separates careful crews from sloppy ones. After the pipes are placed, packing broken pieces of the removed concrete around and under the new lines supports their weight so they do not sag over time. A sagging drain under a finished floor is a problem you find years later, at the worst possible time.
If you are going the ejector route, this is also when the basin gets set into the slab. The basin is a sealed pit, usually 30 gallons or so, that collects everything from the bathroom fixtures before the pump sends it up and out.
Step 4: Vent the System So the Drains Can Breathe
Every fixture needs a vent, and this is where DIY basement bathrooms most often fail inspection. Venting is not optional and it is not cosmetic. Without it, draining water pulls air through the traps, siphons them dry, and lets sewer gas into your finished basement.
How to vent a basement bathroom depends on your house. The best option ties new vent lines into an existing vent stack that runs up through the roof. If the stack is across the basement, that can mean opening walls or running pipe through a chase, which adds labor.
An ejector pump basin adds its own requirement: the sealed basin must be vented too, because the pump needs air movement to work and the basin holds sewage. Air admittance valves, the small mechanical vents some online guides recommend, are restricted in many jurisdictions and are not a substitute for a real vented connection on an ejector basin. Ask your plumber what Aurora's adopted code allows in 2026 before anyone glues pipe.
In addition to plumbing vents, plan for air ventilation. A basement bathroom exhaust fan is required for any bathroom without an operable window, which describes nearly every basement bathroom. Ducting that fan to the exterior, not into a joist bay, is part of the basement bathroom ventilation requirements an inspector will check.
Step 5: Pull the Permit and Schedule Inspections
Get a permit. For a project that involves cutting a slab, running new drain and vent lines, and adding electrical circuits, a basement remodeling permit is not paperwork theater; it is your protection. Unpermitted plumbing surfaces during home inspections when you sell, and in resale-focused neighborhoods it can stall a closing.
Basement bathroom permit requirements in Aurora typically involve a plumbing permit and an electrical permit alongside the general basement finishing permit. Expect inspections at rough-in, before anything gets buried or covered, and again at final. Basement finishing projects commonly see an electrical rough-in inspection early, with an insulation inspection later, so plan your schedule around inspector visits rather than fighting them.
One related code note if your basement bathroom is part of a larger finish that adds a bedroom: every basement sleeping room needs an emergency escape and rescue opening. Under the IRC 2024 code, that egress window must provide at least 5.7 square feet of net clear opening, according to EgressUSA. Egress window sizing is its own topic, but it belongs in the same permit conversation.
Step 6: Install the Ejector Pump and Fixtures
Set the pump, seal the basin, and connect the discharge line with a check valve so waste cannot flow back down. The check valve is a small part with a big job; skipping it means the pipe's contents drain back into the basin after every pump cycle, wearing out the pump early.
Next comes the finish plumbing: toilet, shower valve, sink, and supply lines. This phase feels fast compared to the rough-in because the hard, hidden work is done. It is also where budget flexibility lives. Fixture choices, tile, and vanity are where bathroom remodel ideas on a budget actually save money; the drain and vent work underneath is not the place to cut corners.
Small bathroom ideas matter here too. Most basement bathrooms run tight on space, so a corner shower, a wall-hung sink, and a pocket door can keep a three-quarter bath comfortable without moving walls.
What Plumbing a Basement Bathroom Really Costs
The honest answer is that the cost of plumbing a basement bathroom depends on four things you can now evaluate yourself:
- Sewer depth. Gravity drainage costs less than a pumped system.
- Existing rough-in. Capped pipes in the slab can cut the below-floor work substantially.
- Distance to tie-ins. The farther your bathroom sits from the main drain and vent stack, the more trenching and pipe you pay for.
- Vent path difficulty. An accessible stack nearby is cheap; fishing a vent up two stories is not.
We do not publish dollar figures because they would be guesses, and guesses are how homeowners get lowballed or padded. Suppose two neighbors in Aurora both add a basement bathroom. One has a builder rough-in and a deep sewer line; the other needs an ejector basin, a new circuit, and forty feet of trench. Their quotes should look wildly different, and now you know why. When quotes differ, ask each contractor which of the four factors above is driving their number. A good one will walk you through it. A free estimate that itemizes rough-in, pump, venting, and finish work gives you a real number for your house, not an internet average.
One honest limitation: below-slab drain work, ejector systems, and venting are not DIY-friendly, even for handy homeowners who plan to do their own framing and drywall. Hire a licensed plumber for this phase, and a licensed electrician for the pump circuit. The inspection process exists to catch mistakes, but it is cheaper to not make them.
Get the sewer depth checked, pick your drainage method, and permit the work. Do those three things in order, and the rest of the project is carpentry and tile.
If you need basement finishing, Aurora Basement Finishing Pros can help.
Prefer to talk it through? Call (720) 973-5727 — a quick call is usually the fastest way to get a straight answer for your situation.