
Small Basement Bathroom Ideas: Space-Saving Layouts for Aurora Homes
Adding a bathroom is the most requested upgrade in a basement finishing project, and it is also the one with the most below-grade surprises. Most basement bathroom ideas you find online show pretty tile and floating vanities but skip the hard parts: where the waste line runs, whether you need an ejector pump, and how to vent a room with no window. This guide covers small basement bathroom layouts that save space and money, with the plumbing realities up front. It is written for Aurora homeowners and small landlords who want to know what actually drives the plan before any contractor walks through the door.
One quick note on money. This article will not quote dollar figures, because a basement bathroom addition swings widely based on where your main sewer line sits, how deep it is, and what your slab hides. The honest answer is a free estimate on your actual basement, not a number pulled from a national article. What this list will do is show you which layout choices push cost up and which keep it down.
1. Start With the Drain, Not the Design
Before you sketch a single wall, find your main sewer line. If your basement bathroom can sit near an existing drain stack, gravity does the work and your plumbing cost stays lower. If the fixtures end up far from the stack, or if the sewer line exits the house above the level of your slab, you need a pump.
This is the single biggest cost driver in a basement bathroom, and it is why two quotes for the "same" bathroom can differ so much. A gravity-fed layout near the stack means breaking less concrete. A layout across the basement from the stack means trenching the slab the whole way, or switching to an upflush system. Decide the location first, then design around it.
2. Know Your Three Plumbing Options Below Grade
Plumbing approaches in basement bathrooms come down to three options, each with a clear trade-off:
- Gravity drainage. If the sewer line is deep enough, waste flows out on its own. Cheapest to run long term, but it requires breaking and trenching the slab, which adds labor up front.
- Sewage ejector pump. A pit gets cut into the slab, and a sealed basin with a pump grinds and pushes waste up to the main line. This is the standard fix when gravity will not work, and it handles a full bathroom including a shower.
- Upflush (macerating) toilet. The unit sits on top of the slab and pumps waste through small-diameter pipe to the main line. An upflush toilet bathroom avoids concrete work entirely, which makes it popular for budget-first projects, but the units are louder, need maintenance, and limit fixture placement.
For a landlord adding a basement suite, the ejector pump usually wins. Tenants are hard on plumbing, and a pit-mounted ejector system handles daily use better than an above-slab unit. For a homeowner adding a rarely used half bath, an upflush unit can make sense.
3. Small Bathroom Layouts That Fit a Tight Footprint
A three-quarter bath, meaning toilet, sink, and shower, works in a compact footprint when you plan the layout around clearances instead of squeezing fixtures in after framing. A common small bathroom layout with dimensions in mind runs about 5 feet by 8 feet for a full three-quarter bath, or 5 feet by 5 feet for a half bath. Your local inspector will check fixture clearances, so plan them early.
Space-saving moves that work below grade:
- Use a corner shower or a 32-inch neo-angle unit instead of a tub. Showers almost always beat tub layouts on space and cost in basement bathrooms, and renters rarely expect a tub in a lower-level unit.
- Choose a pocket door. A swinging door eats a third of a small bathroom's floor area.
- Wall-hung or narrow-depth vanities keep the floor visible, which makes a small room feel larger.
- Put the toilet on the wall closest to the drain or ejector pit. Every foot of pipe you save is a foot of concrete you do not cut.
Skip layouts with a tub unless the space is generous and the drain situation is easy. A tub adds trenching, framing, and waterproofing cost that a small below-grade bathroom rarely pays back.
4. Plan Around Low Ceilings and Ductwork
Low ceiling basement conditions shape the bathroom layout more than any Pinterest board will admit. Under residential code, basements without habitable space are permitted a minimum ceiling height of 6 feet 8 inches, four inches lower than the requirement for habitable rooms, according to GreenLancer. Bathrooms get some flexibility, but you still want to place the shower where you have the most headroom.
Ducts, beams, and drain lines often cross a basement ceiling. A good layout tucks the bathroom under existing soffits rather than fighting them. For example, placing the vanity or toilet under a duct run works fine; placing the shower there does not. If your basement runs tight on height everywhere, this is a spot where low ceiling basement solutions like reworking duct runs earn their cost.
5. Solve Ventilation Before Drywall Goes Up
Basement bathroom ventilation requirements are simple in principle: if there is no operable window, you need an exhaust fan that vents to the outside. Not into the joist bay, not into the attic, outside. Bathrooms with no window are completely workable, but the fan duct route has to be planned while the framing is open.
In a below-grade room, moisture control matters double. More than 60% of U.S. homes with basements experience some degree of water penetration or moisture problems, according to the American Society of Home Inspectors. A basement bathroom adds shower steam on top of that baseline. Therefore, spend on a quality quiet fan with a humidity sensor, run rigid duct to a proper exterior termination, and use moisture-resistant drywall in the wet areas. This is cheap insurance against the mold problems that kill basement rentals.
6. Budget-Friendly Finishes That Still Look Intentional
Smart choices for basement bathroom finishes come down to spending where water goes and saving where it does not. The shower surround, the waterproofing behind it, and the exhaust fan deserve real money. The vanity, mirror, and lighting can come from stock lines and still look sharp.
A few finish choices that stretch a budget:
- Large-format porcelain tile or a one-piece shower surround cuts labor hours compared to small tile.
- Luxury vinyl plank flooring handles basement moisture better than wood and costs less than tile to install.
- A stock 24-inch or 30-inch vanity fits most small basement bathrooms and avoids custom cabinetry cost.
- Paint and a framed mirror do more for the room than expensive fixtures in a space this size.
However, do not save money on the ejector pump, the waterproofing membrane, or the fan. Those are the components that fail expensively behind finished walls.
7. If It Serves a Bedroom, Plan the Egress Window Too
For landlords and house-hackers, the bathroom is usually part of a bigger plan: a legal basement bedroom or suite that earns rent. That plan lives or dies on the egress window, not the bathroom. Under the IRC 2024 code, every basement sleeping room needs an emergency escape and rescue opening with at least 5.7 square feet of net clear opening, according to EgressUSA. The opening also needs a maximum sill height of 44 inches above the finished floor and a minimum net clear width of 20 inches, according to The Great Egress Co.
Say a homeowner in an Aurora rental-heavy zip code wants to finish the basement into a bedroom, bathroom, and small living area to rent out. In that scenario, the smart sequence is egress window first, then rough plumbing, then framing. Cutting the foundation for a basement escape window after drywall is up means tearing finished work back out. Egress window sizing and placement should sit on the same plan as the bathroom drain from day one.
8. Pull the Permit, Every Time
Basement bathroom permit requirements in Aurora cover plumbing, electrical, and mechanical work, and inspectors will look at all three. Skipping the basement remodeling permit to save time is the most expensive shortcut in this whole project. An unpermitted bathroom can stall a home sale, void insurance claims after a leak, and, for landlords, undermine the legal status of the rental unit entirely.
The permit process also protects a budget-first planner. Inspections catch bad drain slope, missing venting, and undersized wiring while walls are still open. If a quote comes in far below the others and the contractor waves off permits, that gap in price is usually the corner being cut. As of 2026, Aurora reviews basement finishing plans before issuing permits, so a clear drawing of the bathroom layout speeds the whole project up.
9. Run the Numbers Like a Landlord, Even If You Are Not One
A basement bathroom is what turns a finished basement from bonus space into functional living space, and that shows up at resale. A national basement remodel returns 71% of its cost on average, the highest ROI among newly tracked project categories in the 2025 Cost vs. Value Report, according to JLC. That return assumes the space is genuinely livable, and a bedroom plus bathroom is what makes it livable.
Still, be honest about the trade-off. A halfway finish, meaning cheap materials over unsolved moisture or plumbing problems, tends to return little. The projects that pay are the ones done to code with the wet work handled correctly. For a small landlord, the math is simpler: compare the added monthly rent of a legal one-bedroom suite against the project cost, and the bathroom usually justifies itself within the payback window. A small bathroom remodel cost in an already-finished basement runs lower than a from-scratch addition, since the drain, vent, and electrical may already be roughed in.
10. Know When to Bring In a Pro
Some parts of this project reward sweat equity. Demolition, painting, and setting a stock vanity are within reach for a handy homeowner. The below-slab work is not. Cutting concrete, setting an ejector pit, tying into the main sewer line, and getting drain slope right are jobs for a licensed plumber and an experienced bathroom addition contractor, and most jurisdictions require licensed trades for that scope anyway.
Every basement is different, so treat any layout advice here as a starting point rather than a final plan; your sewer depth, slab condition, and ceiling height can change the right answer. A site visit and a free estimate will tell you which of these basement bathroom solutions your specific basement can support, and what the plumbing path actually looks like before you commit to a design.
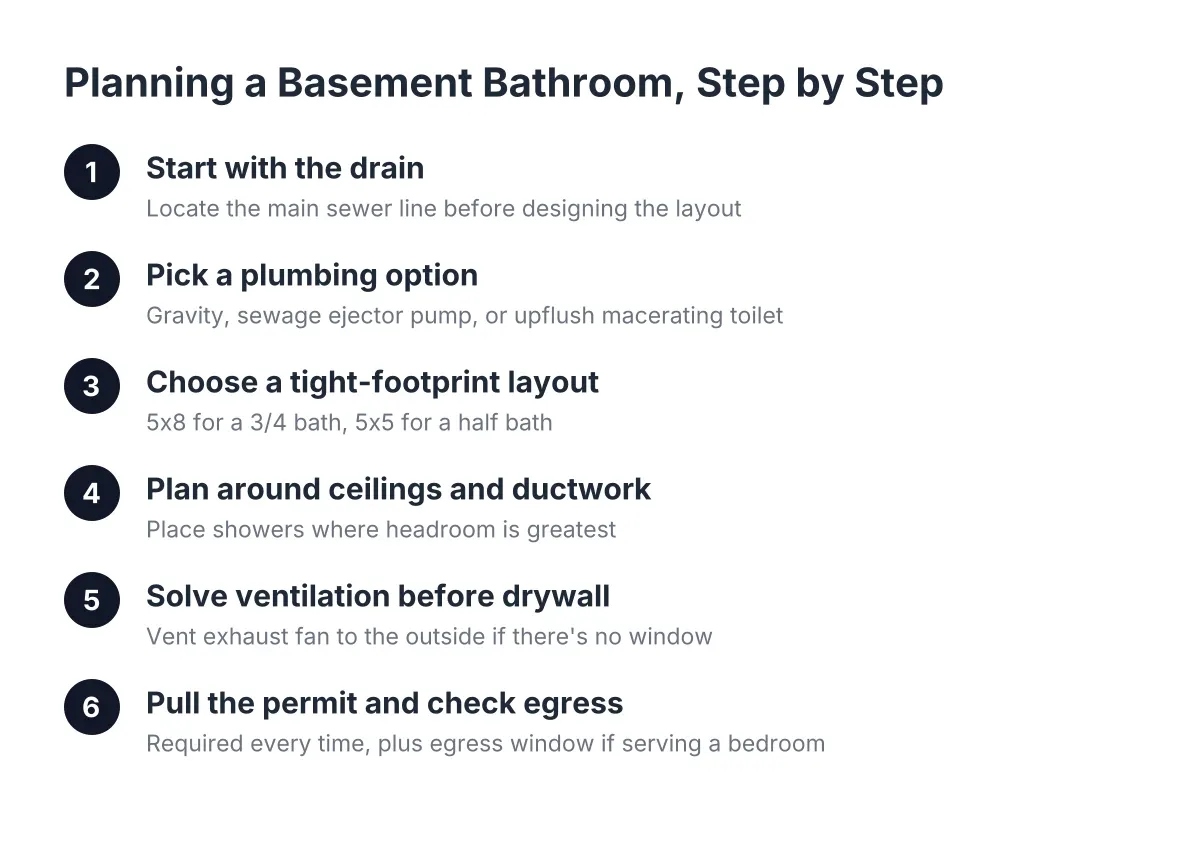
Quick Recap: What Drives a Smart Basement Bathroom Plan
The best basement bathroom ideas start under the slab and work up. In order of importance:
- Locate the bathroom near the sewer line or plan for an ejector pump.
- Pick the plumbing approach, gravity, ejector, or upflush, that matches how hard the room will be used.
- Keep the footprint tight with a shower instead of a tub and a pocket door.
- Vent the room to the outside and control moisture from day one.
- Handle the egress window and permits before finishes, especially for a rental suite.
Get those five right, and the tile, vanity, and lighting choices become the fun part instead of a distraction from problems hiding behind the walls.
If you need basement finishing, Aurora Basement Finishing Pros can help.
Prefer to talk it through? Call (720) 973-5727 — a quick call is usually the fastest way to get a straight answer for your situation.