
Rental Suite Kitchen in a Basement: Code Rules for Appliances and Plumbing in Aurora, CO
A rental suite kitchen in a basement is the piece that turns a finished basement into a space you can legally lease. It is also the piece that trips up the most homeowners in Aurora, CO. Bedrooms and bathrooms have clear rules most DIYers know about. Kitchens are different. Plumbing, venting, electrical circuits, and appliance placement each carry their own code requirements, and the city treats a kitchen as the signal that you are building a dwelling unit, not just a rec room. Understanding basement rental kitchen code requirements is essential before starting your project. Get the kitchen right and the rest of the suite tends to follow. Get it wrong and you may own a suite you cannot legally rent.
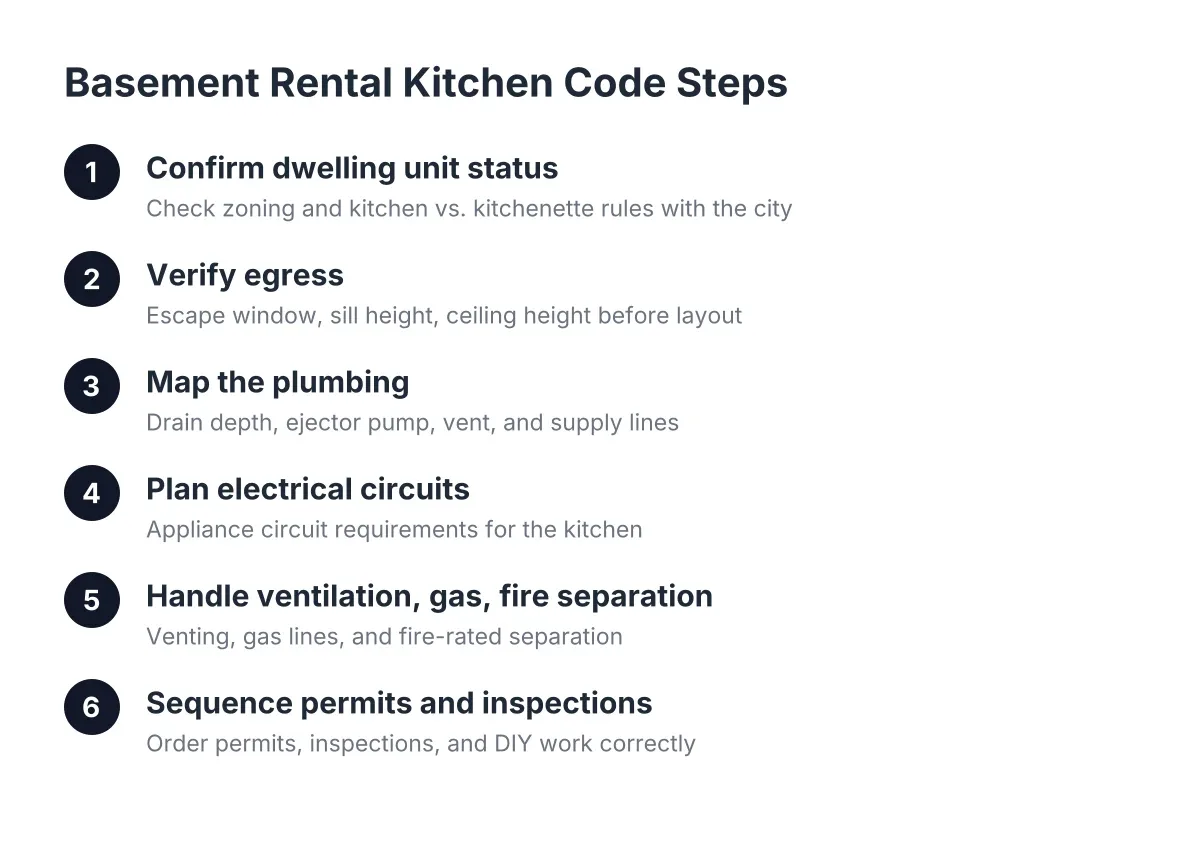
This guide walks through the process step by step, in the order a permit reviewer and inspector will actually look at it. It is written for the homeowner who wants to do some work himself, hire pros for the technical parts, and pass inspection on the first try.
Step 1: Confirm the Kitchen Makes It a Dwelling Unit
Before you buy a single cabinet, understand what a kitchen does to your project on paper. In most jurisdictions, once a basement has its own sleeping area, its own bathroom, and its own cooking facilities, the city no longer sees a finished basement. It sees a second dwelling unit. That changes the permit path, the code requirements, and whether you can rent it at all.
Therefore, your first move is a call or visit to the City of Aurora building division. Ask two questions. First, does your zoning allow a rentable secondary unit at your address? Second, does the city distinguish between a full kitchen with a range and a kitchenette with limited cooking equipment? Some jurisdictions treat a wet bar or kitchenette differently from a full kitchen, and that distinction can decide whether your project is a straightforward basement finish or a full basement rental suite conversion with a heavier review.
Do not skip this step because the answer might be inconvenient. The homeowners who end up tearing out drywall are almost always the ones who built first and asked second. A basement remodeling permit is far cheaper than a red tag.
Step 2: Verify Egress Before You Plan the Kitchen Layout
Egress requirements for a basement suite come before kitchen design, because a suite you cannot sleep in legally is a suite you cannot rent. Every basement sleeping room needs an emergency escape and rescue opening. Under the IRC 2024 code, that opening must provide at least 5.7 square feet of net clear opening area, according to EgressUSA, along with other size criteria measured at the same time.
In addition, the opening has limits on placement and shape. Egress window sizing rules require a maximum sill height of 44 inches above the finished floor and a minimum net clear opening width of 20 inches, according to The Great Egress Co. A separate entrance helps too. A basement egress door at grade, often a walkout or stairwell entry, gives tenants their own way in and out and can satisfy exit requirements while making the suite far more rentable.
Ceiling height matters here as well. Habitable rooms need more headroom than storage areas; basements without habitable space are allowed a minimum ceiling height of 6 feet 8 inches, four inches lower than the habitable-room requirement, according to GreenLancer. If you have a low ceiling basement, measure before you design, because a kitchen is a habitable room and must meet the higher bar.
Cutting concrete for a basement escape window or egress door is not a DIY job. It involves structural headers, waterproofing, and drainage, and it is the single most common point where inspections fail. This is one of the places where hiring an egress window installation pro protects the whole project.
Step 3: Map the Plumbing for the Basement Rental Suite Kitchen
Plumbing is where a basement kitchen either works with your house or fights it. Start by locating your main drain line and figuring out its depth where the kitchen sink will sit. If the drain exits the house above the level of your planned sink, you will need a sewage ejector or drain pump to lift wastewater up to the line. That adds cost, noise considerations, and a component that needs access for service.
Next, plan the three things every code-compliant kitchen sink needs:
- A properly sized drain with a trap, tied into the sanitary system, not a floor drain.
- Venting, either through an existing vent stack or an approved alternative where your jurisdiction allows one.
- Hot and cold supply lines, with shutoff valves you can reach without opening a wall.
When designing a basement rental kitchen with proper code compliance, rough plumbing requires a plumbing permit and an inspection before you close the walls. In Aurora, as of 2026, plan on the rough-in being inspected with the walls open. A Permit-Wary DIYer can often run supply lines himself where the city allows homeowner plumbing work, but confirm that allowance first. If a licensed plumber must pull the permit, hire one for the rough-in and keep the finish work, like setting the faucet and connecting the dishwasher, for yourself where permitted.
One more moisture note. More than 60 percent of U.S. homes with basements experience some degree of water penetration or moisture problems, according to the American Society of Home Inspectors. Before you trap plumbing and cabinets against a foundation wall, fix any seepage and consider a subfloor system under the kitchen area, so one wet spring does not ruin your flooring and base cabinets.
Step 4: Plan Electrical Circuits and Appliance Requirements
A kitchen carries the heaviest electrical load in the suite, so plan circuits before framing. Modern code expects small-appliance circuits for the countertop, a dedicated circuit for the refrigerator in many layouts, GFCI protection at countertop receptacles, and a dedicated circuit for a range or a hardwired cooktop. A full electric range typically needs a 240-volt circuit, which may mean a panel evaluation if your service is already near capacity.
For example, suppose a homeowner in Aurora plans a suite with a two-burner electric cooktop, a small refrigerator, a microwave, and a dishwasher. In that scenario, the electrician might rough in two 20-amp small-appliance circuits, a dishwasher circuit, and a dedicated cooktop circuit, then coordinate with the drywaller, which could be you, only after the electrical rough-in passes inspection. That sequence matters: basement projects generally get an electrical rough-in inspection first, then an insulation inspection later, and drywall goes up only after both.
Hire a licensed electrician for this step even if you plan to do framing, drywall, and paint yourself. Electrical and HVAC work call for licensed trades in most basement finishes, and inspectors look hardest at kitchen circuits. Details matter here too; for instance, exposed non-metallic cable is not best practice, and running Romex inside EMT conduit violates code in damp or wet locations, according to the National Electrical Code (NFPA 70). A basement can qualify as a damp location, which is exactly why this is pro territory.
Step 5: Handle Ventilation, Gas, and Fire Separation
Cooking in a basement concentrates moisture, grease, and combustion byproducts in the tightest air space in the house. Plan a range hood, ideally ducted outside, and confirm the duct route before framing the ceiling. Splitting or rerouting ductwork in the basement ceiling can preserve HVAC coverage while making room for the hood run and even a cleaner ceiling design.
If you want a gas range, the bar rises. Gas piping requires its own permit and pressure test, and gas appliances need combustion air and proper venting. Many Aurora basement suites use electric cooking for this reason; it simplifies the permit, the inspection, and the insurance conversation.
Fire separation is the other requirement homeowners miss. When a basement becomes a separate dwelling unit, most codes require rated separation between the suite and the main house, plus interconnected smoke and carbon monoxide alarms. Your permit reviewer will spell out the exact assembly. Ask before you frame, because adding a rated ceiling after drywall means doing the ceiling twice.
Step 6: Sequence the Permits, Inspections, and DIY Work
Sequence is where DIYers save money without risking the project. Here is the order that keeps a basement kitchen build legal and inspectable:
- Zoning confirmation and basement remodeling permit application, with a floor plan showing the kitchen, bedroom, bath, and egress locations.
- Egress window or basement egress door installation, inspected while the framing and waterproofing are visible.
- Rough plumbing, rough electrical, and any gas or HVAC work, each inspected with walls open.
- Insulation inspection.
- Drywall, paint, trim, and flooring, which is the DIY-friendly stretch.
- Cabinet and appliance installation, final plumbing and electrical connections.
- Final inspection and, where Aurora requires it, any rental licensing step before you list the unit.
Notice where the pro work clusters: steps 2 and 3. That is the honest split for a Permit-Wary DIYer. You handle demolition, framing where allowed, drywall, paint, and finish carpentry. Licensed trades handle egress cutting, plumbing rough-in, electrical, and gas. A good local contractor will price exactly that split rather than pushing you into a full remodel you did not ask for; if a bidder refuses to scope only the technical work, get another bid.
What a Fair Quote for a Basement Rental Kitchen Code Evaluation Looks Like
A fair quote for a basement rental kitchen code evaluation is itemized, not lumped. It should break out egress work, plumbing rough-in, electrical, ventilation, and finish work as separate line items, and it should name who pulls each permit. Ask three questions of any provider: Who pulls the permits, you or me? What happens if the rough-in fails inspection? And which parts of this scope can I legally do myself in Aurora?
Timelines vary with permit review, concrete cutting weather, and appliance lead times, so treat any fixed completion date with skepticism. On the money side, avoid guessing. A basement remodel nationally returns about 71 percent of its cost at resale on average, according to the JLC Cost vs. Value Report, and rental income stacks on top of that. But your actual number depends on your drain depth, panel capacity, and egress situation, which is why a free estimate on your specific basement beats any online calculator.
The Bottom Line for Aurora Homeowners
The kitchen is the legal heart of a basement suite. Egress makes the bedroom legal, but the plumbing, circuits, ventilation, and fire separation around the kitchen decide whether the whole unit passes as a dwelling you can rent. Do the walls and paint yourself. Bring in licensed pros for the egress cut, the rough plumbing, and the electrical, and let the city inspect everything with the walls open.
One caution worth repeating: structural changes, gas work, and anything touching your foundation should always go through a licensed professional and a permit, even if you are confident in your skills. The cost of doing it right once is small next to the cost of tearing out finished work.
If you are weighing this project in Aurora, CO, start with a free basement finishing estimate on your actual space. A local contractor who knows Aurora's permit process and egress window sizing requirements can tell you in one walkthrough whether your drain depth, ceiling height, and window wells support a legal suite, and what the realistic scope looks like before you commit a dollar.
If you need basement finishing, Aurora Basement Finishing Pros can help.
Prefer to talk it through? Call (720) 973-5727 — a quick call is usually the fastest way to get a straight answer for your situation.