
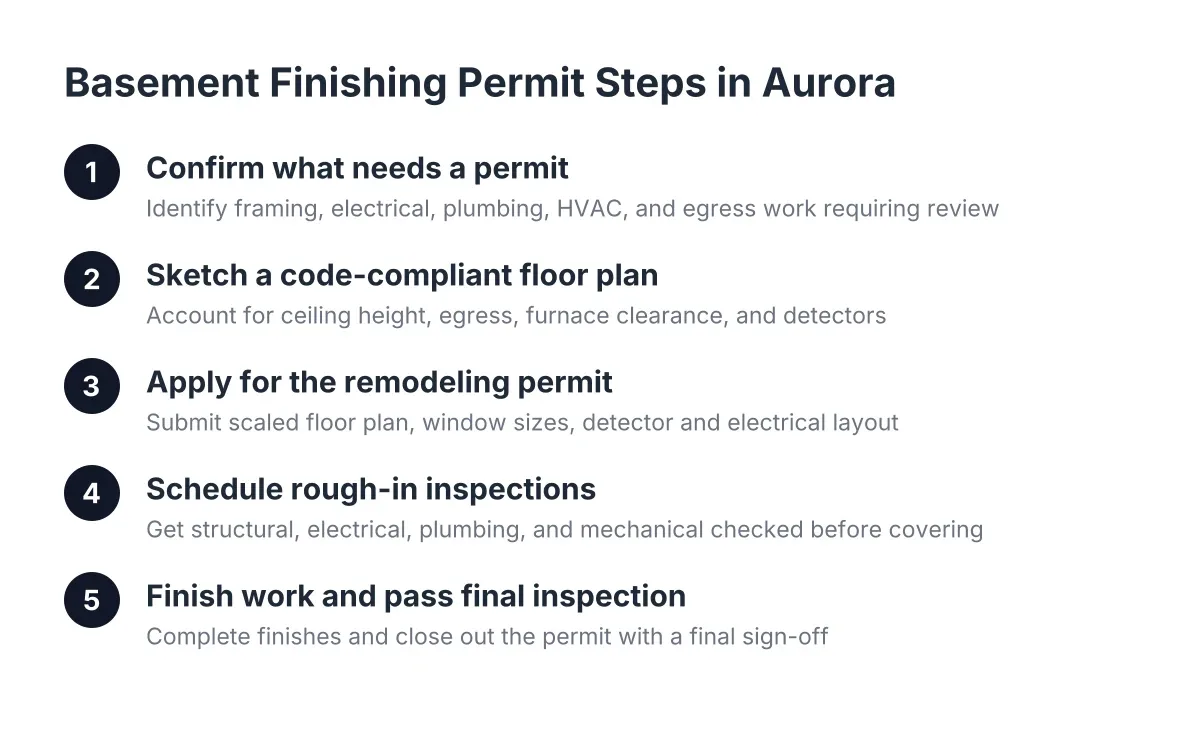
Basement Finishing Permit Requirements in Aurora, CO: A Step-by-Step Guide
If you own a home in Aurora with an unfinished basement, you have probably asked the same question every hands-on homeowner asks: do I need a permit to finish my basement, or can I just start framing? The short answer is yes—understanding the steps to obtain a basement finishing permit and complete the process correctly will save you from the two worst outcomes in this project: failing inspection and tearing out finished work, or getting red-tagged mid-build. This guide walks you through the basement finishing permit steps and inspection process in order, so you can plan your design around what the code actually allows, not around photos from a national site that never mention ceiling height or egress.
One more thing before Step 1. Permits are not just a tax on your project. They are the city's record that your basement bedroom has a legal escape route, your wiring will not start a fire behind the drywall, and your future buyer's inspector will not flag the whole basement as unpermitted work. If you plan to sell in a few years, that paper trail matters as much as the finish quality.
Step 1: Confirm Which Parts of Your Project Need a Permit
Start by separating the work that requires a permit from the work that does not. In Aurora, finishing a basement is a permitted project because you are creating habitable space. That means the city wants to review and inspect the structural, electrical, plumbing, and mechanical work before it gets covered up.
As a working rule for 2026, expect these items to fall under basement finishing permit requirements:
- Framing new walls and creating new rooms
- All new electrical circuits, outlets, and lighting
- Any plumbing, including a basement bathroom or wet bar
- HVAC changes, such as extending ductwork or adding returns
- Cutting a new egress window opening into the foundation
- Adding a bedroom of any kind
Work that generally does not need its own permit includes painting, installing carpet or flooring, and replacing trim. However, those finish items only stay permit-free when they sit on top of permitted rough work. You cannot drywall over unpermitted wiring and call the paint job cosmetic.
This split is good news for the DIYer. You can legally pull a homeowner permit, do your own framing and drywall, and still hire licensed pros for the parts that carry real risk. Most contractors will tell you the same thing: do the carpentry yourself if you want, but bring in a licensed electrician and HVAC contractor. Those trades require licensing for a reason, and inspectors look at their work closely.
Step 2: Sketch a Floor Plan That Code Will Actually Approve
Before you apply for anything, draw your layout. The city will want a floor plan with your permit application, and this is where design and code meet. A plan that ignores ceiling height, egress, or furnace clearances will bounce back, so design with the rules in front of you.
Keep these constraints in view while you sketch:
- Habitable rooms need adequate ceiling height. Many Aurora basements have ducts and beams that drop below the joists, so route hallways and closets under the low spots and keep living areas under full-height ceiling. This is the core move in any low ceiling basement plan.
- Every bedroom needs an egress window or exterior door. No exceptions.
- The furnace and water heater need code-required clearance and access, so plan the mechanical room around them, not against them.
- Smoke and carbon monoxide detectors will be required in and near sleeping rooms.
In addition, think about the space at the bottom of the stairs. A common layout mistake is finishing one side of the basement and leaving the stair landing as unfinished storage, which wastes the first area anyone sees. Treat the landing as the front door of your finished basement, then let the bedrooms, bath, or media area branch off it. If you want more layout inspiration, collect basement design ideas early and test each one against the egress and ceiling constraints above before you fall in love with it.
How Egress Rules Shape Your Basement Finishing Permit Steps
Egress rules decide where a basement bedroom can go, because the room must have a window large enough to escape through and for a firefighter to enter. Under the IRC 2024 code, every basement sleeping room needs an emergency escape opening with at least 5.7 square feet of net clear opening, according to EgressUSA. In addition, the opening must have a minimum net clear width of 20 inches and a sill no higher than 44 inches above the finished floor, according to The Great Egress Co.
Net clear opening is the operative phrase. It is the actual open hole when the window is fully open, not the glass size or the rough opening. Many existing basement windows fail this test even though they look big enough. Measure yours before you assume it passes, because egress window sizing is the single most common surprise in basement permit reviews.
If your foundation needs a new or enlarged opening, that work involves cutting concrete, installing a window well, and sometimes adding structural support above the opening. This is a hire-a-pro item. A botched foundation cut is expensive to fix and will not pass inspection.
Step 3: Apply for Your Basement Remodeling Permit
With your floor plan drawn, submit your permit application to the City of Aurora building division. Expect to provide a scaled floor plan showing room uses, wall locations, window sizes, smoke detector locations, and your electrical layout. If you are adding a bathroom, include the plumbing fixture locations.
As the homeowner living in the house, you can usually pull the permit yourself for work you perform. Your licensed electrician and plumber pull their own trade permits for their portions. Ask about basement finishing permit cost when you apply; fees are set by the city and typically scale with the project value, so get the current number from Aurora directly rather than from a blog.
For example, suppose a homeowner in the Aurora Highlands area wants to turn 800 square feet of unfinished basement into a bedroom, a bathroom, and a family room. In that scenario, the permit package would include the floor plan, an egress window spec for the bedroom, an electrical layout, and plumbing fixtures for the bath. The homeowner could plan to frame and drywall, while an electrician, a plumber, and an egress installer handle their trades under the same project.
Step 4: Schedule Rough-In Inspections Before You Cover Anything
This is the step that trips up more DIYers than any other. Nothing gets covered with insulation or drywall until the inspector has seen the rough work. Basement projects typically involve two separate early inspections: an electrical rough-in inspection first, then an insulation inspection after the wiring passes and the insulation goes in. Following the basement finishing permit steps carefully means planning your sequence like this:
- Frame the walls and complete rough electrical, plumbing, and HVAC.
- Call for rough-in inspections on each trade.
- Fix anything flagged and get re-inspected.
- Install insulation, then call for the insulation inspection.
- Only after that approval, hang drywall.
Therefore, build inspection days into your schedule instead of treating them as interruptions. A weekend warrior who drywalls before the rough-in inspection will be told to open the walls back up. That is the horror story your neighbor warned you about, and it is entirely avoidable.
While the walls are open, address moisture too. More than 60 percent of U.S. homes with basements have some degree of water penetration or moisture problems, according to the American Society of Home Inspectors. An inspector will not always catch a damp wall, but your drywall and flooring will. Even a basement with a vapor barrier under the slab can benefit from a subfloor system that protects the finished floor from a future water event.
Step 5: Finish the Work and Pass Final Inspection
After the rough inspections pass and the drywall goes up, you are in the home stretch. Complete your finishes, install doors and trim, set plumbing fixtures, and mount smoke and carbon monoxide detectors in the required locations. Then call for the final inspection.
At final, the inspector confirms the project matches the approved plan: egress windows operate and meet size requirements, GFCI and AFCI protection is in place, detectors work, and mechanical clearances are maintained. Pass, and your basement is legally finished habitable space. That certificate of completion is what protects you at resale, when the buyer's inspector or appraiser asks whether the basement bedroom is legal.
The payoff is real. A basement remodel returns 71 percent of its cost at resale on average, according to the JLC Cost vs. Value Report, and that return assumes the work is permitted and code-compliant. An unpermitted bedroom, by contrast, cannot be counted as a bedroom at all.
When Basement Finishing Permit Requirements Call for a Pro
Permit requirements for a basement finish do not force you to hire a full-service contractor for everything, but some items deserve professional hands regardless of your skill level. Cutting foundation concrete for a basement escape window, structural changes to beams or posts, and all licensed trade work fall in that category. The trades carry licensing requirements, and the egress cut carries structural risk you cannot sand away.
One trade-off to weigh honestly: doing your own framing and drywall saves labor cost, but it also makes you the general contractor. You schedule the inspections, coordinate the subs, and own the fixes. If that coordination sounds worse than the savings, a local basement finishing contractor who handles basement remodeling permit assistance and egress compliance can carry that load, and a free estimate will tell you what that help costs for your specific basement before you commit either way.
Follow the five steps in order, keep the inspector on your side, and your finished basement will be the kind that passes on the first try and holds its value when you sell.
If you need basement finishing, Aurora Basement Finishing Pros can help.
Prefer to talk it through? Call (720) 973-5727 — a quick call is usually the fastest way to get a straight answer for your situation.