
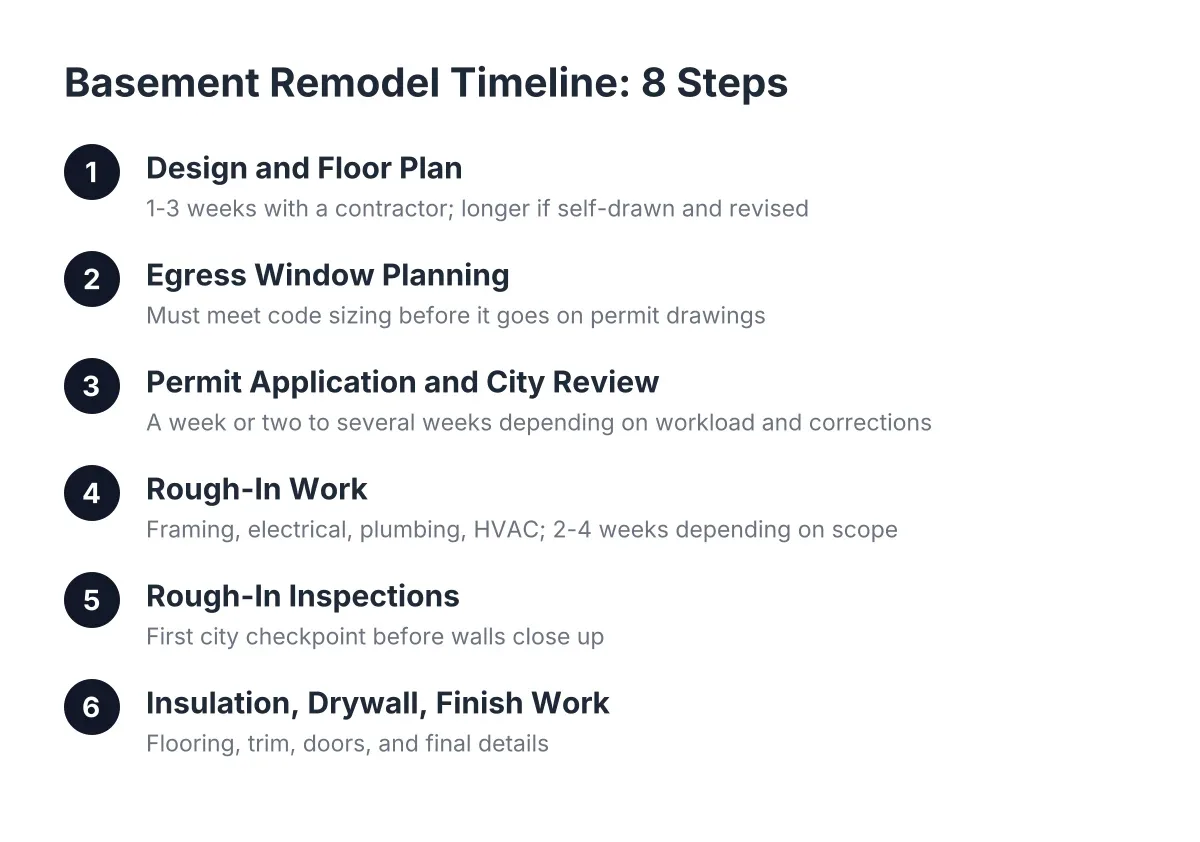
Basement Remodel Timeline in Aurora: 8 Steps From Permit to Final Inspection
If you own an unfinished basement in Aurora and want to turn it into a legal bedroom, rental suite, or family room, the first question is usually not about paint colors. It is about time. A realistic basement remodel timeline in Aurora runs from permit application through rough-in inspections to a final sign-off, and each stage has its own waiting period. This article walks through the eight steps in order, so you know what happens when, which parts you can do yourself, and where the city has to be involved before you close up a single wall.
This matters most for two kinds of readers. The hands-on homeowner who wants to do the drywall and paint but is nervous about permits. And the small landlord who wants a legal basement bedroom and needs the egress window and inspections done right, because an unpermitted bedroom is not a rentable bedroom.
Here are the eight steps, in the order they actually happen.
1. Design and Floor Plan: Where the Basement Remodel Timeline Actually Starts
The basement remodel timeline in Aurora starts before you ever file paperwork, because the city reviews a floor plan, not an idea. You need a drawing that shows room locations, window sizes, ceiling heights, and where the electrical and plumbing will go. Expect to spend one to three weeks here if you work with a basement finishing contractor; longer if you draw it yourself and have to revise.
Get the layout right at this stage, because changing it after permit approval means re-review. One common mistake worth designing around: leaving the space at the bottom of the stairs as unfinished storage and only finishing the room to one side. That wastes the first area anyone sees. Plan the stair landing as part of the finished space, and the whole basement reads bigger.
This is also where you sort out constraints that photos never show. A low ceiling basement limits where a bathroom can go, because drain lines and ductwork eat headroom. If you are browsing basement design ideas online, filter everything through two questions: does it fit my ceiling height, and does it meet egress code for the rooms I am calling bedrooms.
2. Egress Window Planning: The Step That Decides If a Bedroom Is Legal
Every basement sleeping room needs an emergency escape and rescue opening, and the window you have now probably does not qualify. According to EgressUSA, the IRC 2024 code requires a minimum 5.7 square feet of net clear opening for a basement sleeping room, among other size criteria that must be met at the same time. According to The Great Egress Co., the sill can be no more than 44 inches above the finished floor, and the net clear opening must be at least 20 inches wide.
For a landlord, this is the step that turns a basement into legal rental income. Say you own a ranch in an Aurora rental zip code and want to add a basement bedroom to a mother-in-law suite. In that scenario, the egress window installation, including cutting the foundation and setting the well, usually takes a few days of site work, but it has to be on the permit drawings first. Egress window sizing is not a judgment call; it is math the inspector will check.
One practical note: if part of your basement is already finished, a structural frame system installed from the exterior can let the crew cut the opening back only to the interior stud line. That avoids tearing out existing drywall and framing just to add the window.
3. Permit Application and City Review
Do I need a permit to finish my basement in Aurora? Yes. Finishing a basement involves framing, electrical, and usually plumbing and mechanical work, and all of that requires a basement remodeling permit and inspections. Skipping the permit risks a stop-work order, fines, and tearing out finished walls so an inspector can see inside them.
Plan for the city review to take anywhere from a week or two to several weeks, depending on current workload and whether your plans come back with correction requests. Clean, complete drawings move faster. Missing egress details or vague electrical plans are the usual reasons a review bounces back.
For the permit-wary DIYer, here is the honest split. In most cases a homeowner can pull their own permit for work on their own home. However, the permit holder is responsible for code compliance at every inspection. A contractor who handles basement remodeling permit assistance earns their fee here, because they know what Aurora's reviewers flag and can answer corrections fast instead of letting the application sit.
4. Rough-In Work: Framing, Electrical, Plumbing, and HVAC
Once the permit is issued, the build starts. Framing goes up first, then electrical, plumbing, and HVAC rough-in run through the open walls. For a typical basement, this phase takes two to four weeks depending on scope; a bedroom and bathroom layout takes longer than an open rec room.
This is the phase where most DIYers should hire out at least two trades. Electrical and HVAC work require licensed professionals in most cases, and both involve code details that fail inspections when done by feel. Even confident DIYers commonly handle framing themselves and bring in a licensed electrician for the wiring. As one example of how specific the rules get: running non-metallic sheathed cable inside EMT conduit is against code in damp or wet locations, according to the National Electrical Code (NFPA 70). That is the kind of detail an inspector catches and a weekend warrior does not.
A reasonable DIY and pro split for this phase looks like this:
- DIY-friendly: framing layout and assembly, insulation installation, drywall, paint, trim, and flooring
- Hire a licensed pro: electrical wiring and panel work, plumbing drains and supply lines, HVAC ducting, and gas lines
- Hire a pro with foundation experience: egress window cutting and installation, and any structural changes
5. Rough-In Inspections: The First Checkpoint
Before any insulation or drywall goes in, the city inspects the open walls. Basement projects typically require an electrical rough-in inspection first, followed later by a separate insulation inspection. Plumbing and framing rough-ins get checked in this window too. Each inspection needs to be scheduled, which adds days to the timeline even when everything passes.
Therefore, build inspection scheduling into your plan rather than treating it as an afterthought. A failed rough-in means corrections plus a re-inspection, which can add a week or more per miss. The projects that pass on the first try are the ones where the work matches the approved drawings exactly. If you changed something mid-build, flag it before the inspector finds it.
This checkpoint is exactly why the horror stories about unpermitted basements exist. An inspector cannot approve wiring hidden behind finished drywall. Suppose a homeowner finishes a basement without permits and then lists the house; a buyer's inspector notes the unpermitted bedroom, and now the seller is opening walls to get retroactive approval. The rough-in inspection is cheap insurance against that outcome.
6. Insulation, Drywall, and the Remodeling Timeline's Middle Stretch
After rough-ins pass, insulation goes in, then its own inspection, then drywall. Hanging, taping, mudding, and sanding drywall is the longest single stretch of most basement finishing projects, often two to three weeks, because each coat of mud needs drying time before the next. There is no honest way to rush it without visible seams later.
This is also the best stretch for a DIYer to save real money. Drywall and paint are labor-heavy, skill-moderate, and inspected only in the sense that the final walkthrough needs to look done. If your plan is to hire pros for electrical, plumbing, and the egress window and do the finish work yourself, this phase is where that plan pays off. Just confirm the insulation inspection is signed off before you hang a single sheet.
One Colorado-specific caution: moisture. According to the American Society of Home Inspectors, more than 60% of U.S. homes with basements experience some degree of water penetration or moisture problems. Address any dampness before insulation and drywall, not after. A vapor barrier under a concrete slab exists to block ground moisture from moving into the concrete above, according to W. R. Meadows, but older Aurora homes may not have one, so test your slab before choosing flooring.
7. Finish Work: Flooring, Trim, Doors, and the Details People Notice
The last build phase covers flooring, interior doors, trim, paint, and fixtures. Plan for one to three weeks depending on how much of it you do yourself on evenings and weekends versus a crew working full days. This is where design choices from step one show up as real rooms.
For example, carrying a design element like slat wall paneling from the basement up the staircase gives the stairs a finished look and previews the basement's style before anyone reaches the bottom. Treat the base of the stairs as a focal point, not leftover space. For a rental suite, durable flooring and simple, bright finishes matter more than premium materials; tenants and appraisers both respond to a space that feels legitimate rather than improvised.
Keep expectations grounded on resale too. According to the JLC (Journal of Light Construction) Cost vs. Value Report, a basement remodel returns 71% of its cost at resale on average. That is strong, but it is not dollar-for-dollar, so a landlord's math should lean on rent income rather than resale alone.
8. Final Inspection: The Last Stop on the Aurora Basement Remodel Timeline
The final inspection closes out the permit. The inspector walks the finished space and checks the items that matter for life safety: the egress window opens to its required clear dimensions, smoke and carbon monoxide detectors are installed and working, outlets are GFCI-protected where required, and the work matches the approved plans. Pass, and the permit is closed; the bedroom is legal, the square footage counts, and a future buyer's inspector has nothing to flag.
Fail, and you fix the list and schedule a re-inspection, usually a matter of days rather than weeks if the corrections are small. Start to finish, a straightforward basement finishing project in Aurora commonly runs two to four months from permit application to final sign-off, and larger projects with bathrooms and bedroom suites can run longer. Material price spikes can also argue for waiting; when lumber or drywall prices are climbing sharply, delaying the start until prices settle sometimes beats building mid-spike.
How to Keep Your Timeline From Slipping
Most delays trace back to three causes: incomplete permit drawings, failed inspections, and decision changes mid-build. You control all three. Lock the floor plan before you file, build to the approved drawings, and pick finishes before drywall goes up.
If you are interviewing a basement finishing contractor, three questions tell you most of what you need to know in 2026:
- Who pulls the basement remodeling permit, and who meets the inspectors on site?
- How do you handle egress window sizing, and will the window locations be on the permit drawings?
- Can you quote a hybrid scope where I do the drywall and paint and you handle electrical, plumbing, and egress?
A fair quote answers those questions in writing, lists what is included and what is extra, and never asks you to skip the permit. Be cautious with anyone who suggests the city does not need to know; that contractor will not be the one tearing out your walls later.
Every basement is different, and complications like radon, foundation cracks, or active water intrusion deserve a professional assessment before you commit to a schedule. If you want a grounded read on your specific basement, your ceiling height, and what your version of the timeline looks like, a local free estimate is the practical first step. We work on Aurora basements every week, and we would rather walk your space and give you a straight answer than have you guess from a national website that has never seen Colorado soil.
If you need basement finishing, Aurora Basement Finishing Pros can help.
Prefer to talk it through? Call (720) 973-5727 — a quick call is usually the fastest way to get a straight answer for your situation.